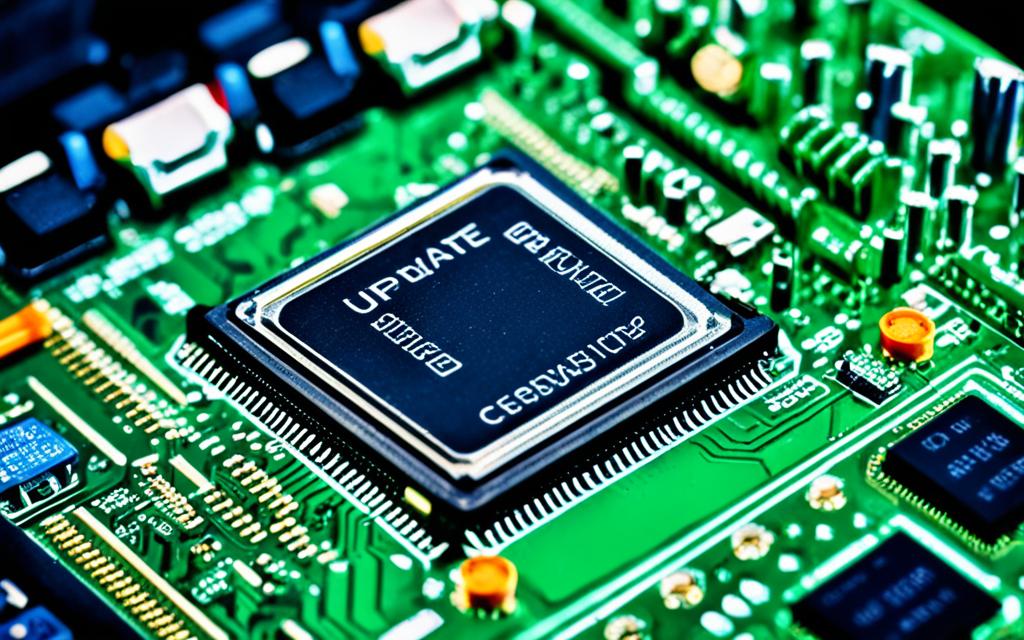
How to Update BIOS on Gigabyte Motherboard: Step-by-Step
Keeping your Gigabyte motherboard’s BIOS up to date is vital. It ensures your computer works well and is stable. This guide will show you how to update BIOS on Gigabyte motherboard. You can use this to get new features, fix problems, or to maintain your system.
We will go through every necessary step from start to finish. This ensures your BIOS update goes smoothly. By the end, you’ll know how to update your Gigabyte motherboard’s BIOS with ease. This will help your system perform at its peak.
Introduction to BIOS Updates on Gigabyte Motherboards
The BIOS (Basic Input/Output System) is key for handling your computer’s hardware and OS. Keeping your Gigabyte motherboard’s BIOS updated offers many perks. These include better system stability, improved performance, and compatibility with new hardware and software.
Importance of Keeping BIOS Updated
It’s essential to keep your Gigabyte motherboard’s BIOS current. Updates fix security flaws, bugs, and enhance system reliability. With the latest bios version, your system will face fewer crashes or freezes, due to improved firmware.
Benefits of Updating Gigabyte BIOS
Updating your gigabyte motherboard firmware brings several advantages:
- Improved system stability and reliability
- Enhanced performance and power efficiency
- Better compatibility with newer hardware components
- Fixes for known bugs or issues in the previous BIOS version
- Support for new features or technologies
Frequent Gigabyte gigabyte bios update means your computer runs smoother. It also stays current with tech advances in hardware and software.
Preparing for the BIOS Update Process
Before updating the BIOS on a GIGABYTE motherboard, it’s important to gather needed info. Being prepared helps to smoothly update the BIOS and avoid issues.
Start by finding out the current BIOS version on your motherboard. Look in the BIOS or use system info software. This tells you which update file to download for your model.
Then, go to the GIGABYTE website and get the latest update file. Make sure to choose the right one for your specific motherboard model. This file has the necessary updates for your motherboard.
Now, prepare a bootable USB drive for the update. This drive will transfer the new BIOS from your computer to the motherboard. Make sure it’s formatted correctly for the update to work.
Key Steps to Prepare for the GIGABYTE BIOS Update:
- Identify the current BIOS version installed on your GIGABYTE motherboard.
- Download the latest BIOS update file from the GIGABYTE website, ensuring compatibility with your motherboard model.
- Create a bootable USB drive that will be used to update the BIOS.
By following these steps, updating your GIGABYTE motherboard BIOS will be simple. You’ll be ready to enjoy the improvements the latest updates bring.
| Task | Description |
|---|---|
| Identify Current BIOS Version | Check the BIOS or system info software to find your GIGABYTE motherboard’s current BIOS version. |
| Download BIOS Update File | Find the latest BIOS update file on the GIGABYTE website that matches your motherboard model and download it. |
| Prepare Bootable USB Drive | Format a USB drive correctly and add the BIOS update file. This makes it ready to update your BIOS. |
Downloading the Latest Gigabyte BIOS Version
Start by finding and downloading the newest BIOS from Gigabyte’s site. This step is key to ensure your computer has the latest stable BIOS. You’ll get better performance, bug fixes, and new hardware support.
Locating the Correct BIOS Update File
Here’s how to get the right BIOS update file for your Gigabyte motherboard:
- Go to Gigabyte’s official site and look for support.
- Find the “BIOS Update” or “Download” section, usually under “Support” or “Downloads.”
- Enter your Gigabyte motherboard model in the search or pick from the list.
- Find and download the latest BIOS version for your motherboard.
Verifying BIOS Update Compatibility
Checking compatibility is key before updating the BIOS. Here’s how to do it:
- Make sure the BIOS file name and version match your motherboard and current BIOS.
- Look at Gigabyte’s site or your motherboard’s docs to make sure the update fits your model.
- If you’re not sure, contact Gigabyte customer support for help.
Getting and checking the right BIOS file is crucial. Doing this ensures a smooth BIOS update for your Gigabyte motherboard. Follow these steps, and you’re likely to see improvements as expected.
Creating a Bootable BIOS Update USB Drive
Updating a Gigabyte motherboard’s BIOS needs a special USB drive. This drive will let us update the motherboard. We need to format the USB drive and put the BIOS update file on it.
Formatting the USB Drive
To get the USB drive ready, we must format it. This ensures it works well with the update. Follow these steps:
- Put the USB drive in your computer.
- Use the Disk Management tool.
- Choose the USB drive and click “Format”.
- Select “FAT32” for the file system.
- Press “OK” to finish the format.
Copying the BIOS Update File
Now, copy the BIOS update file to the USB drive. Be sure to pick the right file for your motherboard. To copy the file:
- Find the file for the update.
- Copy the file (it’s usually a .bin or .exe).
- Paste the file onto the USB drive.
- Check that the file copied and the USB drive is set for the update.
With the bootable USB ready, we can now move on to updating the BIOS on your Gigabyte motherboard.
Entering the BIOS Update Utility
To update your Gigabyte motherboard’s BIOS, we must first enter a special tool. This tool has everything we need to update the BIOS correctly. Now, we’ll show you how to get there.
Make sure you have a bootable USB drive ready for the update. Follow the steps we gave you before. This USB drive holds the update data that you’ll use in the BIOS.
- Start your computer and press the Delete or F2 key many times. This will take you to the BIOS setup menu, depending on your motherboard.
- Find the BIOS section in the menu. It might be named something like “BIOS Features” or “Settings”.
- Look for Update BIOS or BIOS Update. You might see it in a sub-menu about BIOS options.
- Choose the BIOS Update option and do what the screen asks. This will start the BIOS update.
The steps could be a bit different for your specific Gigabyte motherboard. But, the core steps we’ve discussed should help for most models.
After entering the BIOS updater, you’re ready for the next phase. That is, you’ll now be updating the BIOS on your Gigabyte motherboard.
Performing the BIOS Update on Gigabyte Motherboard
Once you’re in the BIOS update utility, carefully follow the on-screen steps for your Gigabyte motherboard. This approach is key to a successful update, without any trouble.
Following On-Screen Instructions
Gigabyte’s BIOS update tool will lead you through updating. Read each step well and do as it says. You might need to choose the right BIOS file, confirm the update, and wait for it to finish.
The steps might change a bit based on your motherboard and BIOS version. But, updating usually means picking the update file, checking the version, and starting the update.
- Locate the BIOS update file you downloaded earlier and select it within the utility.
- Review the BIOS version information and confirm that it matches the update you want to perform.
- Initiate the BIOS update process by following the on-screen prompts.
- Do not interrupt or power off the system during the update, as this could potentially damage your motherboard.
- Wait patiently for the gigabyte bios update to complete, which may take several minutes.
Troubleshooting BIOS Update Issues
Bios updates are usually straightforward, but sometimes problems come up. Knowing how to fix these issues is crucial.
If you face problems, solutions you can try include:
- BIOS update fails or gets stuck: Issues like power cuts, bad update files, and other hardware troubles might happen. If the update fails, try again. If that doesn’t work, check Gigabyte’s support or ask their customer service for help.
- System doesn’t boot after the BIOS update: A non-booting system could mean the BIOS needs resetting or you might need to use a recovery feature to go back to the old BIOS.
- BIOS update takes an unusually long time: Updates can take a while, but a very long update might signal a problem. If it’s too slow, try again. If it keeps up, check Gigabyte’s support materials for help.
Stick to the instructions and be ready to solve problems. By doing so, updating your Gigabyte motherboard’s BIOS should go smoothly.
Verifying Successful BIOS Update
After updating your Gigabyte motherboard’s BIOS, it’s key to check if it was successful. This check makes sure your system runs on the newest Gigabyte BIOS and motherboard firmware. These updates can boost your system’s speed, reliability, and how well it works with different devices.
To check if the BIOS update worked, do the following:
- Restart your PC and press a key like Del or F2 to enter the BIOS setup.
- Go to the “Main” or “System Information” part of the BIOS.
- Check the “BIOS Version” to see if it’s the same as the version you updated to.
If the BIOS version you see matches the latest Gigabyte version, your update was a success. But, if they don’t match, try updating it again.
You also may want to see if your computer’s speed, reliability, or how it works with other devices has improved. This check helps make sure the BIOS update is doing its job right.
Checking that your Gigabyte motherboard’s BIOS update went well is a critical step. It ensures your system is using the newest and best firmware. Confirming the update gives you confidence that your PC is running at its peak.
How to Update BIOS on Gigabyte Motherboard
Updating your Gigabyte motherboard’s BIOS is key to keeping your computer running well. It ensures your PC is stable, works with programs, and is fast. Here, we’ll show you the main steps to update BIOS on Gigabyte motherboards.
To start, find and download the newest BIOS version for your motherboard from the Gigabyte site. Pick the one that matches your board’s model. Next, turn it into a bootable USB to kick off the update.
- Get a USB flash drive and format it to FAT32.
- Put the BIOS update file on the drive’s main folder.
- Restart your computer and press Delete or F2 to get into the BIOS menu.
- Find the BIOS update option and choose the USB as the update source.
- Just follow the screen steps. This might include confirming the update and waiting.
After updating the BIOS, check to make sure it worked. Look at the BIOS version in the menu or use a system info tool. If the version is new, you’re good to go. Update any important settings, drivers, or software now.
Updating is vital for your Gigabyte motherboard’s health. Stick to our guide for a trouble-free update experience.
Post-Update Configuration and Settings
After you’ve updated the BIOS on your Gigabyte motherboard, it’s crucial to check your BIOS settings. This will make sure your system runs as best as it can. You might also need to update drivers or software that the BIOS update changed.
Restoring BIOS Settings
Updating your Gigabyte motherboard’s BIOS can reset your special settings. We recommend checking and fixing these settings to avoid any issues. Make sure to look at your system clock, memory timings, and power management settings.
- Restart your computer to enter the BIOS menu. This is done by pressing
DeleteorF2. - Go to the area where you set up your BIOS settings before.
- See if the settings are still right, or change them if needed.
- Save your changes and leave the BIOS menu to finish.
Updating Drivers and Software
After a BIOS update, you might need to update your system’s drivers or software. For instance, changes in the motherboard’s firmware might need new system component drivers.
- Check the Gigabyte website for updates on your motherboard’s drivers or software.
- Get and install any needed updates to keep your system up-to-date.
- Follow any specific instructions about updating software or drivers after a BIOS update. These should be in the Gigabyte motherboard firmware update documentation.
Checking your BIOS settings and updating drivers and software is important. This helps your Gigabyte motherboard work well after the BIOS update.
Best Practices for Future BIOS Updates
Keeping our Gigabyte motherboards in top shape is very important. Regularly updating the BIOS firmware is vital for this. By updating, we can get new features, make our system more stable, and prevent security problems. Let’s look at how to update the BIOS well in the future.
- Check for BIOS Updates Regularly: Always look for the latest updates on the Gigabyte website or your motherboard’s support page. You can set up notifications or check manually. This keeps you up to date with the newest features.
- Back Up Your System: It’s critical to back up your system before updating the BIOS. Make sure to save important data, settings, and custom changes. This backup helps if the update doesn’t go well.
- Carefully Follow Instructions: Be sure to follow each BIOS update step carefully. Skipping steps or being too quick can cause problems. Your motherboard might not work if not updated correctly.
- Maintain Power Stability: Always make sure your computer has steady power when updating the BIOS. A power cut can stop the update and harm your motherboard.
- Be Cautious with Recovery: When a BIOS update fails, follow Gigabyte’s recovery steps. Don’t use any method that Gigabyte doesn’t suggest. This could make things worse and might cancel your warranty.
These steps ensure easy, safe future gigabyte bios update processes. Being careful and sticking to Gigabyte’s advice keeps our motherboards working well for a long time.

Conclusion
We’ve guided you through updating your Gigabyte motherboard’s BIOS. By following our steps, you now know how to do it right. This will help your system run better with the latest BIOS version.
It’s key to keep your motherboard’s BIOS current. This boosts your computer’s performance and keeps it up to date. With an update, you can fix bugs, enhance security, and enjoy new features. This makes your computer work more smoothly and reliably.
We trust our guide has made BIOS updating clear for you. By sticking to our instructions, you can handle this task with confidence. Ensure you back up your data and be careful. Reach out for help if you’re unsure about anything.